Monday, November 19, 2018

Prepare like a Pro – 4 Winter Landscaping Tips

As the temperatures continue to fall, daylight hours get shorter, and the final leaves begin to fall off the trees. One might think this marks the end to another season in the landscape.  In one aspect, this is correct; the growing season is over.  But, there is still much you should do to the landscape to prepare it for the stresses of Winter.  Here’s 4 Winter landscaping tips from a pro.

Winter Landscaping Tip #1 – Dormant Season PruningCrown Reduction

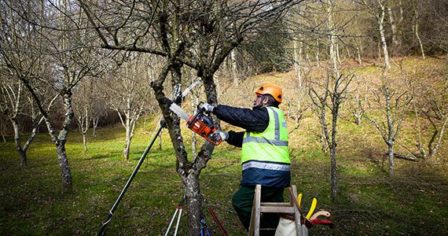
Pruning of your trees and shrubs during the growing season, in most cases, is a must.  To keep the plant clean and shaped, cut back some of the new growth that comes out as it grows.

Once the plant goes dormant however, one would think that there is no need to prune anymore.  That is not the case!  When there are no longer any leaves on the trees and shrubs, you can easily see up into the plants.  This inspection may reveal a very thick and densely branched tree or shrub.  In most cases, this is not an ideal growth habit for the plant.  Thinning to reduce that density of the branches will help the overall health of the tree or shrub.

Another benefit that dormant season pruning has for you is that the debris that you create from the pruning is substantially less because there are no leaves to worry about.  In some cases, this translates to a lower cost to have a professional do the job.  Less debris means less for them to haul away.

Winter Landscaping Tip #2 – Perennial Cut Back

Another type of plant that benefits from pruning are perennials.  As freezing temperatures hit, most Spring, Summer and Fall blooming perennials begin to store their energy for the Winter down in their root system.  The result is a brown plant on top.  You could leave these ugly, brown remnants of the perennial in your landscape, but that isn’t very visually appealing.  Also, having a lot of dead foliage in your garden provides great places for rodents to hide and feed on the root system of your plants.  The best thing to do is to cut back the foliage remnants of your perennials.  Your final result will be plants cut to a few inches about the ground level.

Winter Landscaping Tip #3 – Fertilization of Trees and Shrubsfertilizer injection

Giving your trees and shrubs the proper nutrition is vital to the success of their growth and structure.  With a low amount of nutrition in the soil, many plants will struggle to stay healthy.  Plants will lack the proper color foliage and have limited blooms.   Additionally, having a stressed tree or shrubs increases the chance of disease or insect infestations.  There are two main type of fertilization that can be done in the Fall that help the landscape.  A liquid fertilization can be performed around the drip line of a tree or shrub and instantly puts the nutrients into the soil.  A granular fertilization is also placed around the drip line of the tree or shrub and the product will slowly dissolve into the soil.

Either option is a good choice for the Fall.  The vital nutrients that are in the fertilizers will remain in the soil until the Spring time.  This means these nutrients are ready be there to be taken up once the plant emerges from Winter.  Fertilization can be done in the Spring time for trees and shrubs too, but it can take some time in order for nutrients to be absorbed.  So, having the greatest impact starting the Spring season off would be a Fall fertilization.

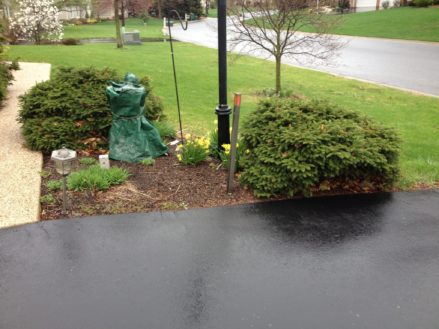
Winter Landscaping Tip #4 – Fall Planting

Once you have gone through your landscape pruning your trees and shrubs, cutting back your perennials, and fertilized the beds, you may begin to starting thinking about what next Spring could bring and what you could do now to fill in a few areas that just seem to be missing something.  A good thing to do in the fall is planting of perennials, trees and shrubs.

mulching bedsA large benefit of planting in the fall is the reduced amount of watering you will need to do.  When you plant something in the spring or early summer, the foliage and root system are actively growing.  This means a large amount of water to keep them going.  When you plant in the Fall, perennials, trees and shrubs are just about dormant.  Because the ground stays moist with more frequent rainfalls it takes the watering labor away from you.

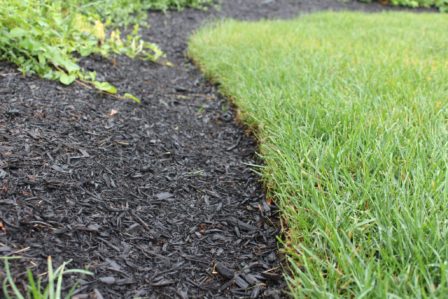
Also, when planting in the Fall make sure to provide your new and existing plants with a good layer of mulch to help insulate the soil.  This practice helps reduce the chance of heaving from the alternating freezing and thawing of the ground.


Being outside in late Fall weather may not always be pleasant, but making sure your trees and shrubs are protected from the potential damages of the Winter are necessary.  Making sure you tackle each of these steps above will help to ensure that your landscape is properly protected this Winter.  If you’d like a free consultation about Winter landscaping, please Contact Us.

The post Prepare like a Pro – 4 Winter Landscaping Tips appeared first on Tomlinson Bomberger.


from Tomlinson Bomberger https://ift.tt/2Trk92L

Monday, November 12, 2018

The Benefits of Landscape Lighting on Your Commercial Property

Your commercial property is extremely visible during the daylight hours. Signage is easy to read. Turf glimmers with fresh morning dew. Plants are healthy and green with touches of fall blooms. In the sunlight, your property shines. 

However, you might have noticed those daylight hours do not stay for long. As evening approaches visibility isn't as clear, and visitors are left scrambling to their cars or designated areas. 

So, how can additional hours of light help your Atlanta commercial property? For starters, it adds an extra security feature. This reassures employees and tenants that building owners and managers are thinking about their well-being.


from HighGrove's Atlanta Commercial Landscaping Blog https://ift.tt/2DeNdoy

Wednesday, November 7, 2018

Winter Containers

The post Winter Containers appeared first on Miss Smarty Plants.

I know it seems so early, but now is a really good time to make your winter containers. These simple instructions will show you just how easy it is to add some holiday cheer and interest to your garden with very easy winter containers.

At the end of the summer and a good part into fall, it seems like this is a now or never type of project. As in, if I don’t do it now I will never do it!  These bare planters need some sprucing up and today was the day to get it done.

I’ve always had good intentions of doing this, but it seems like it just hasn’t taken priority. I started by gathering some broken branches from evergreens around our home, looking for branches that were crossing or were just starting to get in the way of the lawn mower. I know that a variety of textures and even colors will make this more interesting and was able to find a nice assortment.

Winter Containers

The centerpiece for these planters on each side of our front steps are some bright red upright branches. A special type of dogwood perhaps? Nope, just some sucker branches from a tree that I spray painted red last year. They still look great so I am reusing them again.

Many of the evergreens that I used for this were broken branches that needed to be cleaned up. This seemed like a great reason to do so! I also trimmed excessively long, or in the way, branches too.

Winter Containers

The recent rain makes inserting these branches into the wet soil very easy and also makes it easy enough to point the stems in different directions to create a full look. At some point, hopefully very far away, the soil will freeze and add more strength to keep these winter containers in all season. Winter ContainersI chose to start by adding my painted branches to the middle of the planter. I would love to add more, but I know that may not happen, so it will look okay with just these in the centers. Next, add the branches of the evergreen that you have the most of and place those throughout. The beauty of making your winter containers now is that the soil is pliable and will let you add branches at different angles, so even with a minimal number of branches it can look full!

Some branches, like the Colorado Blue Spruce shown below make great accents. I had a couple of containers still looking nice so I simply left the calibrachoa flowers and stuck these evergreens in around it. They will need an accent once the flowers are gone, but for now it will do. Winter Containers

Overall, I think these winter containers turned out great for my first attempt. The entire project took less than an hour and I will be able to enjoy them all winter long. Want more inspiration? I love reading Deborah Silver’s posts on Dirt Simple about her projects, many of which are fabulous seasonal containers. So make the most of this time of year and collect your own pieces for beautiful winter containers this season.

The post Winter Containers appeared first on Miss Smarty Plants.


from Miss Smarty Plants https://ift.tt/2yVEBAs

Thursday, November 1, 2018

3 Tips to Prepare Your Landscape for Winter

We often receive calls from clients in Spring and Summer, concerned about the health of their beloved landscape plants.  Maybe it was a planting done in honor of a departed loved one, or perhaps it’s a hedgerow planted for privacy.  Whatever the reason, many people are concerned because of dead or damaged parts of the plant.  And often, the culprit is damage done the prior Winter.  Read up on 3 tips to prepare your landscape for Winter.

Winter Protective Sprayswinter protective spray

This practice isn’t very common Central PA, but should be.  Basically, the idea is to help prevent damage to evergreen plants in your landscape by providing them with some protection from the extreme temperatures that can cause damage in the Winter.

Let’s review some basics of plant biology.  All plants go through a process where they take in water through their root systems and naturally release some through leaf or needle tissue.  This process is called “transpiration.”  If you’ve ever been on a hike on a summer day, you may have noticed it is more humid walking through a wooded area than an open field.  This is due to transpiration – the trees are allowing a small amount of water to basically evaporate through the leaf tissue.

Winter damage to landscape plants occurs when plants transpire faster than they can take in more moisture.  When the ground is frozen, plants can’t bring in moisture quickly enough to prevent damage from transpiration.

That’s where anti-desiccant sprays, also known as “Winter Protection” sprays, come into play.  These sprays basically help to seal in the moisture present in the leaf/needle tissue.  This coating slows the transpiration process with the goal of ensuring that the plant can intake and release the proper amount of water.

Plants to Treat

According to Michigan State University, there are specific plants you should target.  Short-needled conifers (Eastern hemlock, Alberta spruce, Serbian spruce, juniper, etc.) should be sprayed.  Also, broadleaf evergreens (boxwoods, rhododendrons, and hollies) are also at risk of winter damage and should be treated.

Preventing too much moisture from being released should help prevent Winter damage to the plant material.  It’s not foolproof, but done regularly and well, makes a big difference.  This is particularly important for plants susceptible to other pest or disease issues.  For example, a series of well-timed Winter Protective sprays for boxwoods may reduce the risk of contracting boxwood blight.  There’s no treatment currently available for boxwood blight, so reducing the likelihood of contraction can help prolong the life of the plant.  This is a great way to ensure a healthy landscape for Winter.

fertilizer injectionFertilization

The growing season brings a whole host of challenges to your landscape.  There are always a number of stressors on your plants throughout the season.

These include pest pressure, disease pressure, heat stress, over watering, under watering, and depleted soil nutrients to name a few.  That doesn’t even include any pressure the plant feels from pruning (proper or improper), damage from traffic compacting the soil, etc.

Again, a quick lesson in plant biology.  Many plants store up a nutrient reserve, like a “rainy day” fund.  When they’re under severe stress, they tap into that “fund” in order to help them get through a rough patch.  You’ll often see this with trees that are stressed; they will suddenly sprout new “branches” much lower on their trunks or branches.  The only place you should see leaves emerging on a tree is at the end of a branch.  When these little “water sprouts” emerge off the trunk or lower on branches, you know the tree is under stress and is utilizing this nutrient reserve to try and compensate.

Fertilization makes sure that these “rainy day funds” on your landscape plants are topped off.  It helps the plants to fight off stress from the Winter and emerge healthy and full the following Spring if you’ve fertilized late Fall.  All plants in your landscape can benefit from this service, but especially those that aren’t “looking good.”  If your plant doesn’t look “normal,” you should probably have it fertilized to help it recover from stress.  Don’t overlook this important step!

Make Sure Plants Are Sited Properly

This one is a little tricky, especially for landscapes that are already well established.  The principle is pretty simple: don’t place plants in places that are bad for them during the Winter.

It sounds easy but is harder than it looks, as there’s a lot to consider.  Even an untrained professional can look at certain things and predict where problems will arise.  For example, where do you “dump” your snow when you shovel it?  Most of us put it right along the edges of the walkway or driveway, right?improper plant siting

Well, is that pattern of snow piling up over and over again going to put additional stress on the plant you want to go there?  If so, you may want to consider placing that particular plant in another location.

Other considerations have to do with the plants themselves.  Does the plant you want need full sun or partial shade?  What’s the drainage of like?  Some plants require great drainage, while others prefer a moist soil.  What about soil pH?  Again, some like a balanced soil and other plants require an acidic or alkaline soil.

An important consideration for Winter is the salt tolerance of plants.  Some plants do not do well with high salt content in the soil, like white pines.  Plants sited along a walkway or roadway (where plow trucks will be close) that do not respond well to high levels of salt could be problematic.

If you’re unsure of plant selection and placement, consultation with a professional might be in your best interest to ensure the overall health of the landscape.  If you live locally and would like to speak with us about preparing your landscape for Winter, you can contact us here.

The post 3 Tips to Prepare Your Landscape for Winter appeared first on Tomlinson Bomberger.


from Tomlinson Bomberger https://ift.tt/2DiENh5

Tuesday, October 23, 2018

Tips for Using Your Garden to Help Sell Your Home

The post Tips for Using Your Garden to Help Sell Your Home appeared first on Miss Smarty Plants.

First impressions are important. Seeing as your garden is the very first thing somebody sees when looking up, visiting, or driving past your home, it is imperative that you keep it in pristine condition. Follow these tips for using your garden to help sell your home fast!

You should start preparing the outdoor aspects of your home at least a month before you plan on hosting showings. In doing so, you will be given some leeway in case anything happens to go wrong, or in case you decide to change anything.

Listed below are some things you can do to keep your garden looking sharp throughout your home selling process.

1. Seasonal Plants and Aesthetics:

One way to catch the eye of any passerby is through a little pop of color! Planning your landscape to the current or upcoming season can make people turn their heads in the direction of your home!

For instance, bright pink and yellow flowers can be planted to signify spring, which will radiate joy and happiness! If you’re selling in the fall, oranges and reds could be used to shed a little festivity on your garden.

2. Standing Out

In many neighborhoods, things can begin to look a little repetitive. A cookie cutter home with a perfectly trimmed lawn and a freshling painted fence. Bor-ing!

One way to spruce up your garden, and make your home stand out, is by adding some sort of natural characteristic that your neighbors don’t have. This could be anything from a different type of tree, to a rock bedding.

Before making any drastic changes, check into the rules of your city and neighborhood, as well as a plant’s survivability according to your area’s climate.

3. Outdoor Furniture

Another way to make a home seem more cozy and livable is by adding some outdoor furniture to your garden!

Items that would look cute include swings, water foundations, birdbaths, statues, chairs, and tables. All of these items can be found at home goods stores, such as Lowe’s or Home Depot.

4. Showing Your Pride

Having well-rounded connections can be beneficial in all aspects of life, even when it comes to real estate. One way you can create connections among the people viewing your house is by hanging a college or sports team flag within the plants of your garden.

For instance, let’s say you’re a Miami Dolphins fan, and you wish to demonstrate this by placing a flag in your yard. Every other fan is going to have a connection with you, for merely having similar taste. This could significantly increase your chances of closing a deal!

5. Festive Decorations

Having a little bit of festivity can go a long way. Not only does hanging holiday decorations within and around your yard make it more fun to look at, but it can also make your home appear more family-friendly.

If you aren’t a fan of clutter, don’t fret! Even the simple placement of a candle-lit jack-o-lantern in the fall or Christmas lights in the winter can shine a light on your garden, figuratively and literally!

If you’re selling a home in the warmer months, where there aren’t many major holidays, try adding some simple summer decorations. For instance, you could add an animal statue, such as a flamingo or dog, or even add a piece of authentic art.


This contributed post may contain affiliate links. 

The post Tips for Using Your Garden to Help Sell Your Home appeared first on Miss Smarty Plants.


from Miss Smarty Plants https://ift.tt/2yTVIlg

Friday, October 19, 2018

Late Fall Seeding Myths

We have been getting the question “When is my seeding going to be done?” a lot lately.  It’s a valid question, particularly in light of the challenging year we’ve had for lawn care in Central Pennsylvania.  Many clients have concerns that their seeding is being done too late in the season, and that the seed won’t come in or is too late in the season.  Here, we’ll dispel some late Fall seeding myths.

It’s too late in the year to do seeding

Myth: After a certain date on the calendar, you’re too late in the season to do an effective seeding job on a lawn.

Fact: Seeding results have to do with a whole host of factors.  The date on your calendar is not one of them.

Factors that DO effect seeding are things like soil temperature, moisture in the soil, nutrient availability, soil profile (how deep it is), the amount of available sunlight, and the amount of moisture given to the new seed (how you water it).

The assumption that many people make here is that because it’s “too late in the year,” that the soil temperatures will not be good for seed to come in.  In fact, over the last few years, we’ve had great soil temperatures for germination well into November.  We have no reason to suspect that this trend will not continue this year.

Slice SeedingYou can’t seed once there’s been a frost

Myth: Once there’s been a frost, there is no chance that seed will germinate.

Fact: An early season frost may affect seed that has already germinated, but should not affect seed still in its casing.  Also, a single frost doesn’t mean that soil temperatures will not continue to be favorable to germination later in the Fall.

The onset of early Fall frost does not mean your seeding hopes are dashed.  This is especially true if you seeded within a couple of days of that frost, or if you haven’t seeded at all yet.

Here’s the science: seeds that are still in their casing are relatively unaffected by freezing temperatures.  They can lay dormant for a long time, and just “wait it out” until conditions are favorable for germination.  This is why you may have grass types pop up in your lawn that you don’t recognize.  We frequently get questions about this – “Where did that grass come from?” as a client points to a clump of tall fescue or a large patch of rough bluegrass.

The answer is often that the seed has been in the soil for some time, waiting for good conditions to begin its germination and maturing process.  Once conditions are right, the grass will grow.  The same holds true to for the healthy seed you’re trying to introduce late in the season!

If your lawn was recently seeded, and the seeds have germinated but are still very immature, there’s a chance those seedlings will die with an early frost.  In these cases, there’s often seed that hasn’t germinated yet laying alongside that new seed.  When Spring arrives, you’ll likely get continued growth from seed sown the prior Fall.

If you seed too late in the Fall, your lawn won’t fill innewly germinating fescue

Myth: Seeding late in Fall means your lawn will never fill in.

Fact: Dormant seeding often yields incredibly satisfactory results.

Late Fall seeding often generates an incredibly productive growing season the following year.  That seed will lay dormant until conditions are right.  Dormant seeding is a very viable option for re-establishing the desired turf density.

Some of our clients (including the owner of our company) get this done for their property.  This is also how we maintain the turf density on many of the athletic fields we’re responsible for in school districts, colleges, and universities across the Mid-State.

If late Fall seeding works to maintain turf density on a lacrosse field (perhaps the most damaging sport to turf), it will certainly help you maintain a thick, beautiful lawn.

If you do a late Fall seeding, you can’t apply crabgrass control

Phosphorus LevelsMyth: Because you seeded so late in the season, you are going to have to deal with crabgrass next Summer, or risk killing that seed.

Fact: There are other options for control products that do not interfere with your seeding.

This myth was, at one time, based in fact.  For years, the only crabgrass control products (call “pre-emergent herbicides”) worked that way.  They created a barrier in the soil, and any type of grassy plant that came into contact with it was controlled.

In recent years, lawn care technology has come a long way.  Your lawn care professionals now have a few different options to selectively target grassy weeds.  This means your late Fall seeding will still have a chance to germinate in the Spring, while still controlling the crabgrass.  It’s the agronomic equivalent of “having your cake and eating it, too.”  It’s the best of both worlds.

You should communicate with your lawn care professionals if you have done a late Fall seeding yourself.  This will allow them to adjust your program to make sure you get those specialized products.  If you contracted your service provider to do the seeding, check to make sure they’ve adjusted your lawn care program for Spring to compensate.

If your lawn doesn’t look filled in by Winter, your seeding didn’t work

Myth: A re-seeded lawn should look completely “thick” by Winter.

Fact: Cool-season grasses take a long time to mature.

Cool-season grasses are what we grow best here in Central Pennsylvania.  There are four main varieties that grow well here: perennial ryegrass, Kentucky bluegrass, tall fescue and fine fescue.  Most of them germinate in a moderate amount of time (10-14 days).  Bluegrass can take up to three weeks to begin to germinate.

Once the germination process has begun, cool-season grasses have a maturation process they go through (like every other living thing).  They often look like a single “hair” growing out of the ground for a number of months.  These seedlings then go through a process called “tillering” where they “fill out” – you’ll have several blades of grass on a single plant.

Tillering often takes about six months for cool-season grasses, regardless of species.  It’s going to be mid-to-late Spring before that tillering happens.

Conclusion

For the many reasons listed above here, we recommend waiting until late April or early May in our area to evaluate whether or not a seeding has been effective.  It may take that long to determine how much tillering has happened.

If you’re an existing client of ours, please contact us with any concerns you may have about your lawn.  Also, please know that we will be making program adjustments (like using a different crabgrass control) to seeding we’re performing later in the season.


If you’d like to speak to one of our lawn care professionals about lawn care or seeding questions, please Contact Us.

The post Late Fall Seeding Myths appeared first on Tomlinson Bomberger.


from Tomlinson Bomberger https://ift.tt/2JaBo40

Wednesday, October 10, 2018

3 Ways To Keep Your Commercial Property In Tip-Top Shape Year-Round

While fall may feel like the end of the growing season, it’s actually the perfect time to plan improvements and maintenance tasks for your Atlanta commercial property. This is the season of rejuvenation to your landscape to give it an extra pop for the upcoming months. 


from HighGrove's Atlanta Commercial Landscaping Blog https://ift.tt/2ydSLMW

First Lady Jill Biden and the White House Garden

Now that almost everyone concedes that the Bidens will be moving into the White House soon (hopefully, soon enough!), local garden writers ...